FREE easy corner to corner cocoon cardigan pattern – Nain
This post may contain affiliate links. This means I may earn a small commission if you make a purchase from these links, at no additional cost to yourself.
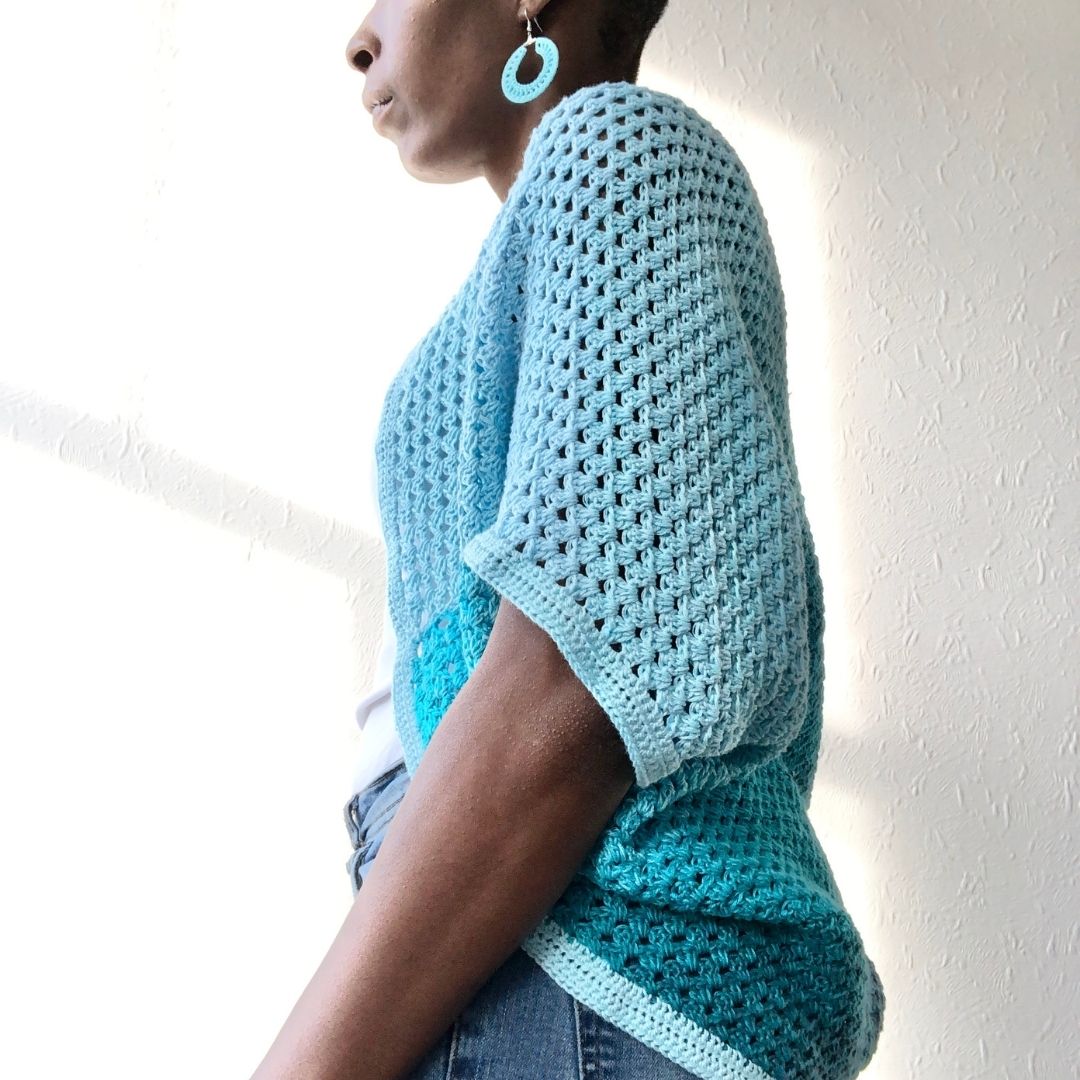
Looking for an easy crochet cocoon cardigan pattern? The Nain Cocoon is a beginner corner to corner cocoon cardigan pattern. Use familiar stitches in within a traditional technique to create your own version of this versatile crochet cocoon cardigan pattern. Read on to find out more and access the free pattern below.
Nain Cocoon inspiration
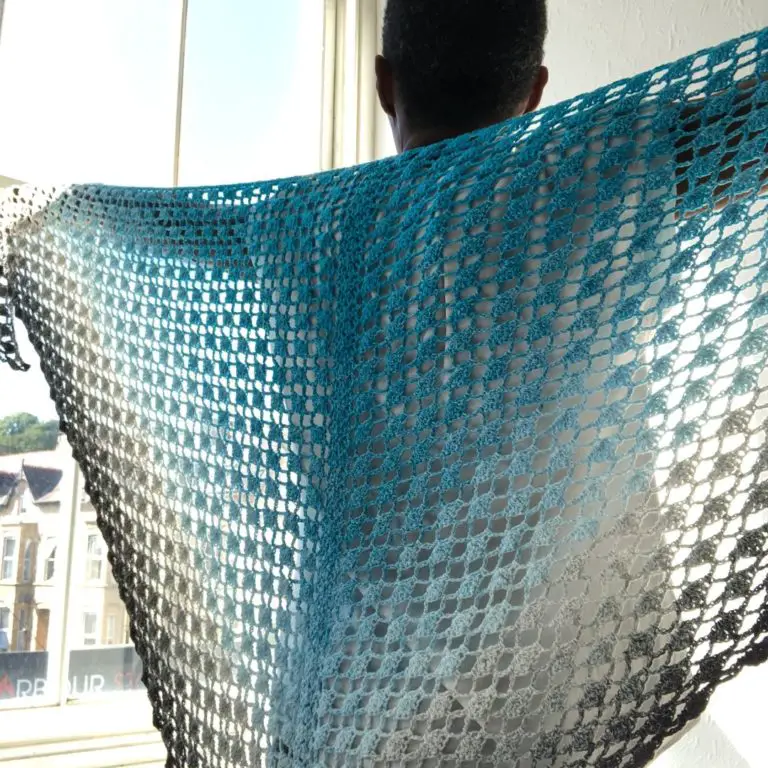
I’m a layerer and I love cardigans so look for opportunities to make cardigans that are stylish and affordable. This granny corner to corner cocoon cardigan pattern started life as a random project that became a cardigan as it grew. Using the granny stitch to create the corner to corner fabric, this beginner cocoon cardigan crochet pattern is a great introduction to garment making using familiar stitches. I had recently made the Nain Scarf and Sweater and still couldn’t stop making myself use this stitch combination!
Nain c2c cocoon cardigan yarn & materials
To make my corner to corner cocoon cardigan I used a favourite yarn, Twister and Twister Solid from Hobbi. If you are new to the Twister range, this is a gradient 4ply yarn with an acrylic cotton blend. Available in xx colours, and having complimentary colours in the Twister Solid range, this is a great choice for a lightweight cardigan.
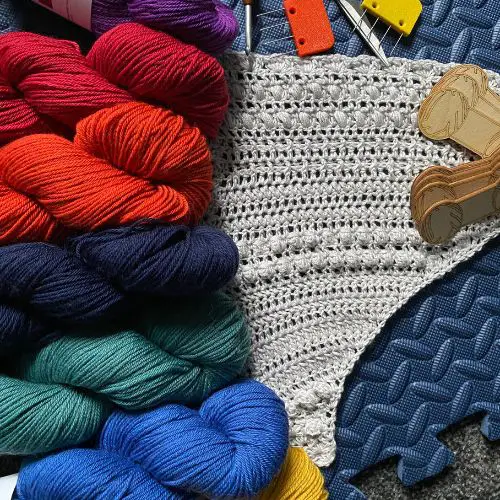
To create my colour flow, I worked from the outside of the cake to create the body and used a complimentary solid in the lightest (centre) colour of the cake. Normally I would work centre out from the larger cake, but this was designed wholly from my stash and so I had to work with the colours I had available and was not tempted to rewind the cake!
Love cocoon cardigans? Check out the Granny Merge Cocoon for an alternative summer crochet cocoon cardigan pattern.
Easy crochet cocoon cardigan pattern info & tips
This is an easy beginner crochet pattern. The corner to corner technique may not be something you are familiar with, however, it is very easy to pick up, works up quickly and is very versatile. I used a 4mm crochet hook when creating this design, and am not a huge stickler for gauge, however as this is a garment design and so guage is a little more important but not fatal.
If you need to adjust more than 1 whole hook size in either direction to achieve the gauge this will likely effect the size of your finished garment a little. You want to achieve a fairly firm but flowy fabric but not too loosy goosey if you see what I mean.
Yarn alternatives – Nain crochet cocoon cardigan
As this is a beginner cocoon and essentially made from rectangles, there are a wide variety of choices available for similar and alternative weight yarns to work with.
Fingering weight – for alternative yarns in the same weight as designed, check out Scheepjes Whirl and Whirlette, OR you could choose the same total yardage in a combination of hand dyed skeins, like Unicorn, from Hobbii, or the Rainbow Bamboo Cotton.
DK – lots of choice. For acrylic yarns, my go to favourite would be Paintbox DK from Lovecrafts, grab a couple of colour packs, or a 10 pack in a single colour. Lion Brand Mandala Cakes, or Hayfield Spirit DK are multi-coloured acrylic options. These would both introduce different colour variances to your finished c2c cocoon cardigan, BUT, all would be unique and beautiful.
For a natural fibre option I would probably choose Stylecraft Naturals Bamboo DK and a 4.5mm or 5mm hook depending on how the fabric felt/looked.
Aran/Worsted – again I would head to Lovecrafts for Paintbox Simply Aran. Any worsted weight yarn would work, however, for a similar fit, you may find that working a size smaller than your bust is the optimum way to go.

Terms: US crochet terms
Pattern type: written, includes schematic
Sizes: XS – 5X (28 – 62 in bust)
Skill level: easy, beginner
Yarn: 1 x Twister 1000m/1092yds 4 ply (sport/fine) gradient yarn cake, and 1 – 2 x Twister Solid 400m/ xx yds in a complimentary colour
Hook: 4mm Clover Amour
Other Materials: stitch markers, darning needle, scissors, tape measure
Stitches used:
- Chain
- Double Crochet
- Single Crochet
- Half Double Crochet
- Single Crochet Two Together
- Slip Stitch
Nain – C2c Cocoon Cardigan crochet pattern
Buy your ad free digital download copy of the Nain easy crochet corner to corner cocoon cardigan pattern from your favourite pattern store below.
Free corner to corner cocoon cardigan pattern
Notes:
- Ch1 does not count as a st
- Ch3 does count as a st
Stitches & Abbreviations:
- Chain – ch
- Turning Chain – tch
- Single Crochet – sc
- Double Crochet – dc
- Half Double Crochet – hdc
- Single Crochet Two Together – sc2tog* see special stitches
- Granny Stitch – gs* see special stitches
Special Stitches
Single Crochet Two Together (sc2tog) – insert your hook into the specified st or sp, yarn over and pull up a loop, then insert your hook into the next st or sp, yarn over, pull up a loop, yarn over and draw through all 3 loops on the hook.
Granny Stitch (gs) – 3 dc in the specified sp
Body
To make your body please make the size that corresponds with your bust measurements. For a looser fit, make the next size up, for a more snug fit, go down one size.
Start:
Ch3, join with a sl-st into the 3rd chain from the hook to make a ring.
Row 1:
Ch3, 4 dc into the ring. Ch3, turn.
Row 2:
Gs into the space between the 1st and 2nd dc below, sk1 gs, 4dc into the space between the 3rd and 4th dc. Ch3 turn
Row 3 – 62(64,66,70,76,78,80,82,84):
Gs into the space between the 1st and 2nd dc below, [sk gs, gs into the space], repeat this to the last sp, 4dc into the space between the last 2 dc. Ch3 turn.
Decrease Row 1:
Sk gs, gs in the sp, sk gs, gs in the sp] repeat across to the last sp, sk3 dc in the top of the tch. Ch3, turn
Decrease Rows 2 – 61 (63,65,69,75,77,79,81,83):
Repeat row decrease row 1 until you have 2 spaces and one set of gs left.
Final Decrease Row:
Ch3, sk3 dc, sl-st into the top of the tch. Tie off and secure your ends

Join
Lay your work out flat and fold it in half. Using two stitch markers mark a point 6 – 7 inches up from the open edge on both sides of your work. Join with the mattress stitch from the marked stitch OUT towards the open edge on both sides. This will create the sleeve opening and body area/cocoon shape.
Sleeves
Round 1:
Join with a sl-st into the sp directly before the centre seam of the sleeve, sc2tog over the same space and the next sp, then sc evenly around placing 1 st in every st and 2 sc into any spaces. Join with a sl-st into the top of the beg sc2tog.
Round 2:
Ch1, hdc into the same st, hdc around. Join with a sl-st to the top of the beg hdc
Round 3:
Ch1, sc into the same st, sc in every st around. Join with a sl-st to the top of the beg sc.
Round 4:
Ch1, hdc into the same st, hdc in every st around. Tie off and secure your ends.
Body Edging:
Round 1:
Join with a sl-st into the sp directly before the centre seam of the sleeve, sc2tog over the same space and the next sp, then sc evenly around placing 1 st in every st and 2 sc into any spaces. Join with a sl-st into the top of the beg sc2tog.
Round 2:
Ch1, hdc into the same st, hdc around. Join with a sl-st to the top of the beg hdc
Round 3:
Ch1, sc into the same st, sc in every st around. Join with a sl-st to the top of the beg sc.
Round 4:
Ch1, hdc into the same st, hdc in every st around. Tie off and secure your ends.
I hope you enjoyed the post and look forward to seeing your Nain Cocoons!
For alternative corner to corner patterns, check out Cloverleaf and the Nain Scarf.
Pop into the Facebook Group and let me know what colour you plan to make your wrap in and share your progress.
Bye for now,
B x




Beautiful pattern & your work is flawless. Thanks!
thank you. I hope you enjoy making it, please share a pic if you do.
B x