FREE Easy Crochet Bralette – Granny Merge Bralette
This post may contain affiliate links. This means I may earn a small commission if you make a purchase from these links, at no additional cost to yourself.
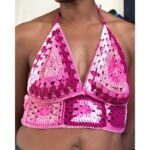
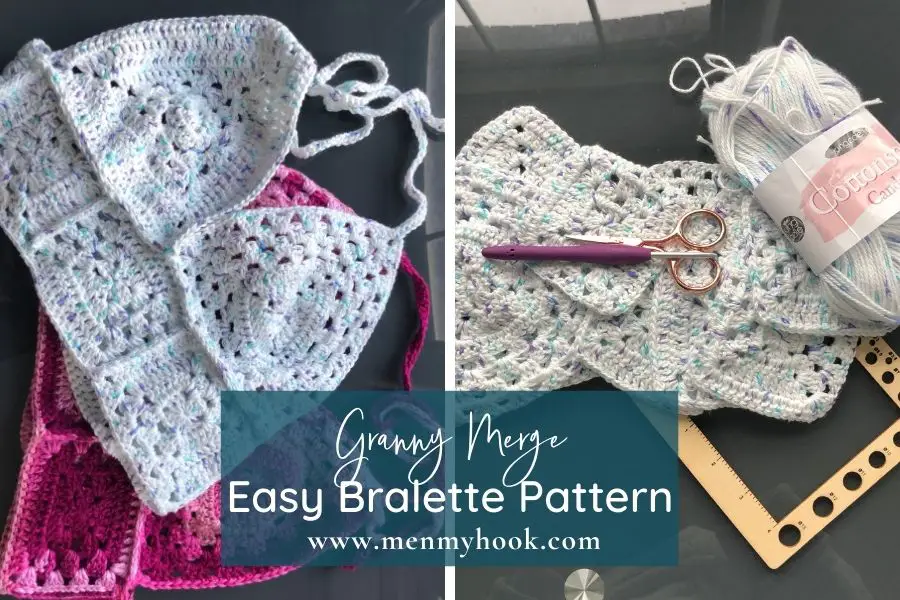
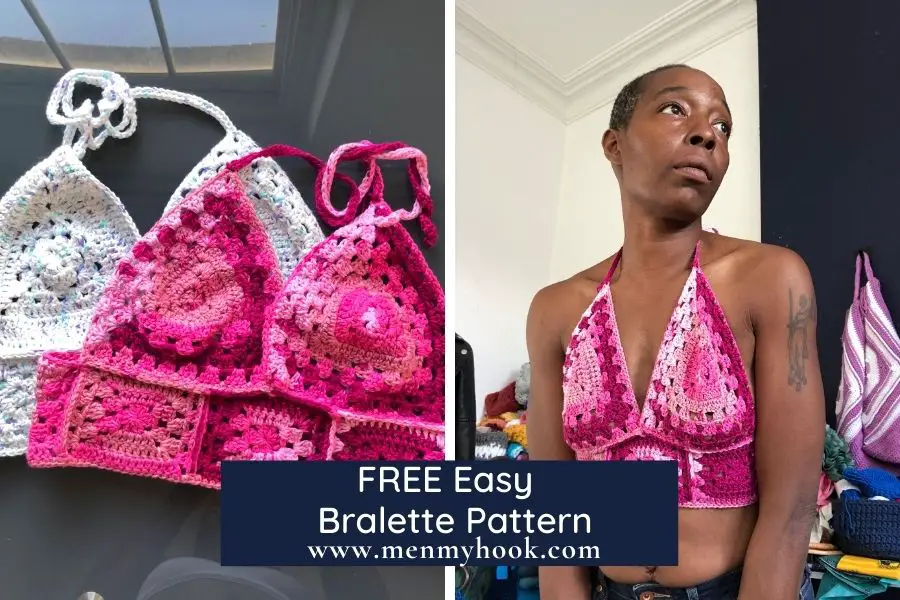
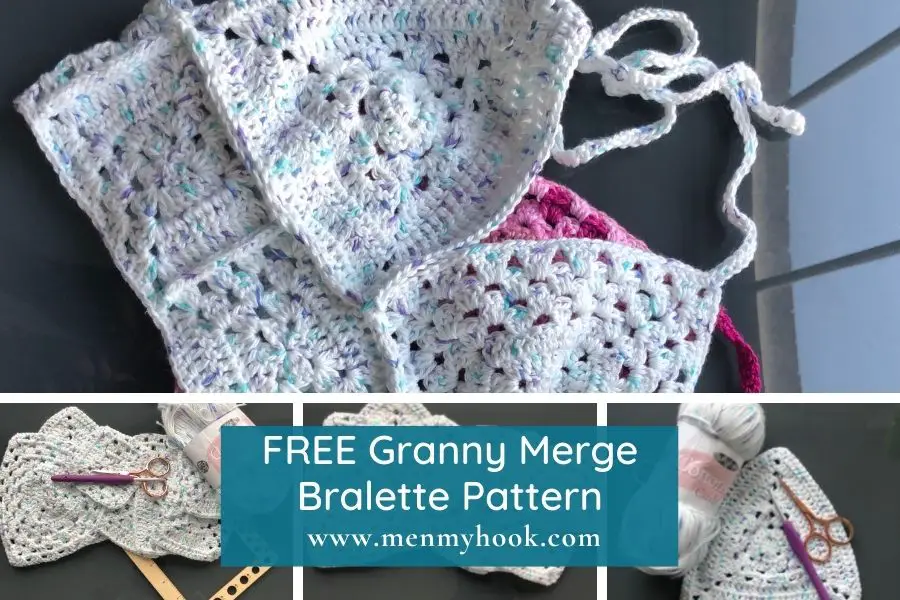
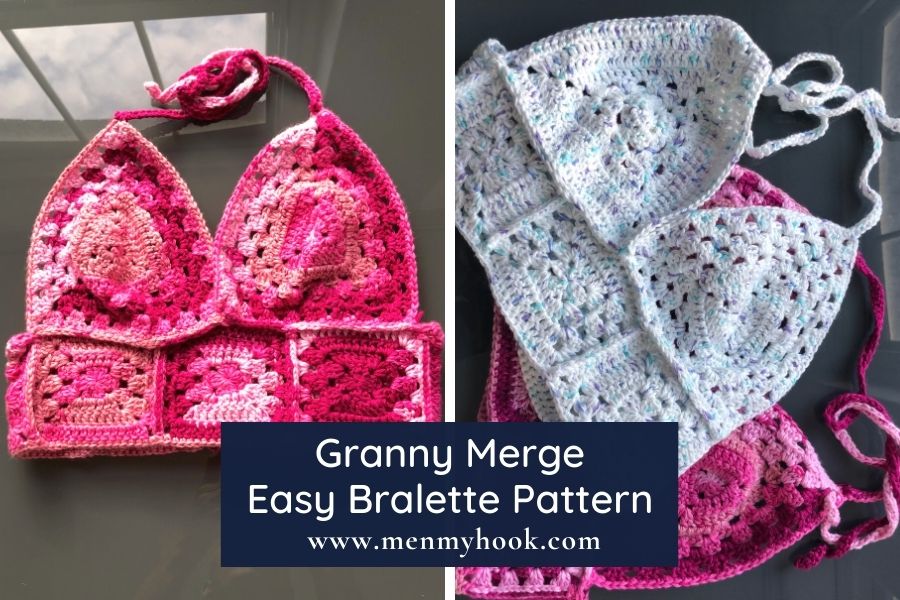
Looking for an free easy crochet bralette pattern? The Granny Merge Bralette uses two beginner motifs to create an easy to make and wear crochet bralette. Read on to find out more and how to make your own easy crochet bralette below.

Granny Merge Bralette pattern inspiration
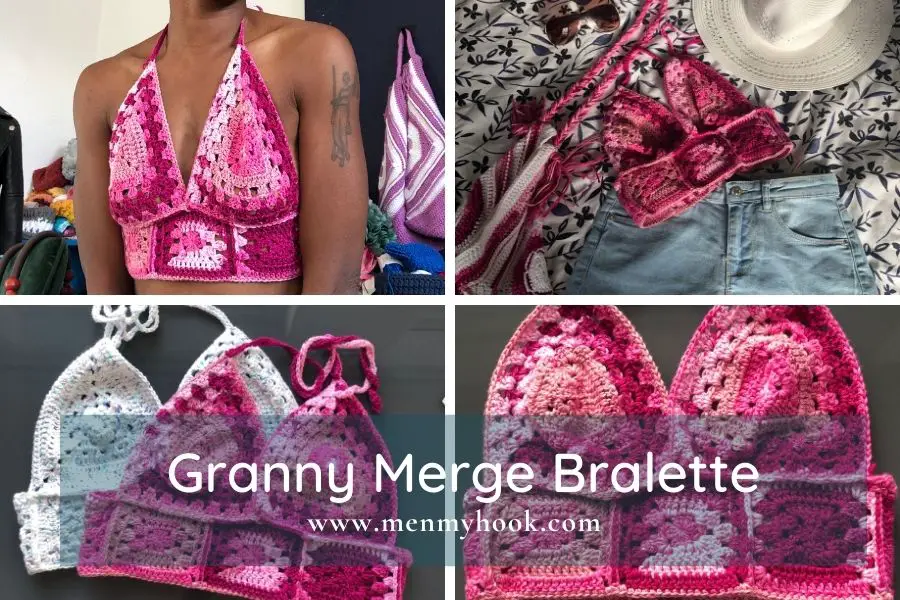
While I was working on the Granny Merge Maxi Dress, I also took part in a test for the Bella Bralette by Cosy Rosie UK. Although I don’t really wear bralettes as daywear, on the beach I am totally there for it. This easy crochet bralette pattern is the type of bikini top I generally would wear / go for.
Easy crochet bralette pattern yarn & materials
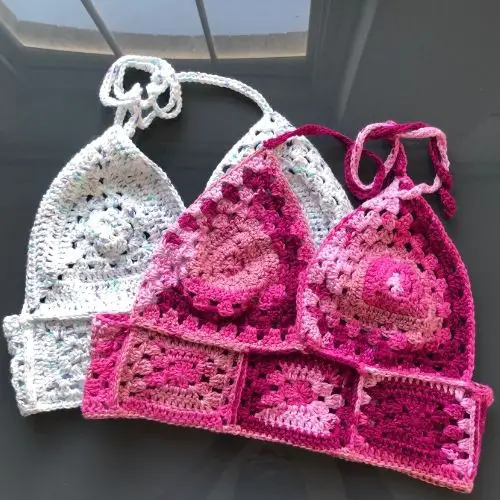
To create my easy crochet bralette I used King Cole Cottonsoft Candy Crush DK. This is a 100% cotton dk weight yarn. This is a variegated version of the Cottonsoft DK that I used to create the On the Bias Tote. For the Pink version I used shade 2434, for the white I used Cottonsoft Candy in shade 2851. This is a very soft and easy to work with cotton, making it great for easy wearable crochet projects. Unlike other regularly available cottons, this comes in 100g skeins making this, for some sizes, a one skein crochet bralette pattern.
Granny Merge Bralette crochet pattern info & tips
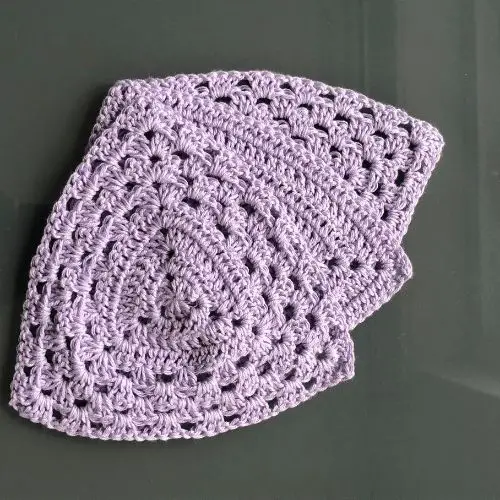
The Granny Merge Bralette is a beginner size inclusive boho bralette pattern. Made using multiple motifs, this design works up quickly as it uses beginner stitches to create an easy to wear crochet garment. This made to measure boho bralette crochet pattern is made up of multiple granny squares and triangle motifs, finished with slip stitches.
Gauge isn’t super important in this easy boho bralette crochet pattern, tight uniform stitches are. If your tension is a little loose, use a slightly smaller hook than recommended as there will be a little stretch in the fabric.
Type: written
Terms: US
Skill: Beginner, easy
Yarn: 1 – 2 x King Cole Cottonsoft Candy DK or 100 – 200g of any DK or 3 weight yarn.
Hook: 4mm
Other materials: tape measure, darning needle, stitch markers.
Stitches used:
- Chain
- Slip Stitch
- Single Crochet
- Double Crochet
- Half Double Crochet
Get the Granny Merge Crochet Bralette Pattern
Get your Ad FREE Digital Download Pdf copy of the Granny Merge Bralette crochet pattern from your favourite pattern store below
FREE easy crochet bralette pattern
Notes:
- Ch3 counts as a dc
- Ch1 does not count as a st
- Rounds begin in the MIDDLE of the first corner of the round. Stitches at the end of the round will complete the corner
- All corner stitches on the are marked in bold
Each ‘solid granny’ side grows by 4 stitches be mindful of the hidden stitch
Stitches & Abbreviations:
- Magic Ring – mr
- Single Crochet – sc
- Half Double Crochet – hdc
- Double Crochet – dc
- Slip Stitch – sl-st
Special Stitches:
Granny Stitch (gs) – 3dc into the specified st or sp
Hdc join – on the body section this is used to create a ch2 sp AND join at the end of the round. To complete this joining method, after completing the last stitch of the round, yarn over and insert the hook into the top of the beg ch3 of the round, yarn over and pull through all the loops on the hook as you would a hdc.
Sizes:
| To fit bust (ins) | ||
| XS 28 – 30 S 32 – 34 M 36 – 38 | L 40 – 42 XL 44 – 46 2X 48 – 50 | 3X 52 – 54 4X 56 – 58 5X 60 – 62 |
Cups
Start:
MR
Round 1:
Ch3, 2dc into the ring, *ch2, gs into the ring* twice, hdc join to the top of the beg ch3. Turn
Rounds 2 – 4:
Ch1, sl-st into the ch2 sp below, ch3, dc into the sp, dc in each st across, *(2dc, ch2, 2dc) in the ch2 sp, dc in each st across,* twice, 2dc into the ch2 sp, hdc join into the top of the beg ch3. Turn
Round 5:
Ch1, sl-st into the ch2 sp below, ch3, 2dc into the ch2 sp, ch1, sk3, *gs into the next st, ch1, sk3,*to the next ch2 sp, *(gs, ch2, gs into the ch2 sp), ch1, sk3, *gs into the next st, ch1, sk3 to the next ch2 sp,* twice, gs in the ch2 sp, hdc join into the top of the beg ch3. Turn
Rounds 6 – to 8:
Ch1, sl-st into the ch2 sp below, ch3, 2dc into the ch2 sp, ch1, *gs in the next ch1 sp, ch1,* to the next ch2 sp, *(gs, ch2, gs into the next ch2 sp), ch1, *gs in the next ch1 sp, ch1,* to the next ch2 sp,* twice, gs in the ch2 sp, hdc join into the top of the beg ch3.
For Sizes XS – S – tie off and secure your ends.
For Sizes M – repeat rounds 3 – 4
For Sizes L – repeat rounds 3 – 4 twice
For Sizes XL – repeat rounds 3 – 6
For Sizes 2X – repeat rounds 3 – 8
For Sizes 3X – repeat rounds 3 – 8, then 3 – 4
For Sizes 4X – repeat rounds 3 – 8, then rounds 3 – 4 twice
For Sizes 5X – repeat rounds 3 – 8, then rounds 3 – 6
To adjust the size of your bralette cups, add or subtract rows in PAIRS.
Your finished cups should have approximately DOUBLE the no of rounds as your squares.
Band
Make 7
Start:
Magic Ring
Round 1:
Ch3 (counts as a dc here and throughout), 2dc into the ring, [ch2, 3dc into the ring], repeat 3 times, hdc join (see special stitches) into the top of the beg ch3. Turn
Round 2:
Ch1 – does not count as a st, sl-st into the ch2 sp below. Ch3, 2dc into the ch2 sp, ch1, sk3, (3dc, ch2, 2dc) into the next ch2 sp, dc in every dc to the next ch2 sp, (2dc, ch2, 3dc) in the next ch2 sp, ch1, sk3, (3dc, ch2, 2dc) in the next ch2 sp, dc in every st on the side, 2dc into the ch2 sp, hdc join into the top of the beg ch3. Turn
Round 3:
Ch1, sl-st into the ch2 sp below. Ch3. dc into the ch2 sp, dc in every dc on the side, (2dc, ch2, 3dc in the ch2 sp), ch1, 3dc in the next ch1 sp, ch1, (3dc, ch2, 2dc in the next ch2 sp, dc in every dc on the side, (2dc, ch2, 3dc in the next ch2 sp), ch1, 3dc in the next ch1 sp, ch1, 3dc in the corner, hdc join to the top of the beg ch3. Turn
Round 4:
Ch1, sl-st into the ch2 sp below. Ch3, 2dc into the ch2 sp, [ch1, 3dc into the next ch1 sp], repeat to the last ch1 sp on the side, ch1, (3dc, ch2, 2dc into the next ch2 sp), dc in every dc on the side, (2dc, ch2, 3dc in the next ch2 sp), [ch1, 3dc in the next ch1 sp], repeat to the last ch1 sp on the side, ch1, (3dc, ch2, 2dc in the next ch2 sp), dc in every dc on the side, 2dc in the ch2 sp, hdc join to the top of the beg ch3. Turn
This is the final round for sizes XS – S
Round 5:
Ch1, sl-st into the ch2 sp below. Ch3, 2dc into the ch2 sp, [ch1, sk3, 3dc in the next st], repeat until 3 sts remain on the side, ch1, (3dc, ch2, 2dc in the next ch2 sp), dc in every st and sp on the side, (2dc, ch2, 3dc in the next ch2 sp), [ch1, sk3, 3dc in the next st], repeat until 3 sts remain on the side, ch1, sk3, (3dc, ch2, 2dc in the next ch2 sp), dc in every st and sp on the side, 2dc in the ch2 sp, hdc join to the top of the beg ch3. Turn
Round 6:
Ch1, sl-st into the ch2 sp below. Ch3. dc into the ch2 sp, dc in every dc on the side, (2dc, ch2, 3dc in the ch2 sp), [ch1, 3dc in the next ch1 sp], repeat to the last ch1 sp on the side, ch1, (3dc, ch2, 2dc in the next ch2 sp), dc in every dc on the side, (2dc, ch2, 3dc in the next ch2 sp), [ch1, 3dc in the next ch1 sp], repeat until the last ch1 sp on the side, ch1, 3dc in the corner, hdc join to the top of the beg ch3. Turn
This is the final round for sizes M – L
Round 7:
Ch1, sl-st into the ch2 sp below. Ch3, 2dc into the ch2 sp, [ch1, 3dc into the next ch1 sp], repeat to the last ch1 sp on the side, ch1, (3dc, ch2, 2dc into the next ch2 sp), dc in every dc on the side, (2dc, ch2, 3dc in the next ch2 sp), [ch1, 3dc in the next ch1 sp], repeat to the last ch1 sp on the side, (3dc, ch2, 2dc in the next ch2 sp), dc in every dc on the side, 2dc in the ch2 sp, hdc join to the top of the beg ch3. Turn

Round 8:
Ch1, sl-st into the ch2 sp below. Ch3. dc into the ch2 sp, dc in every dc on the side, (2dc, ch2, 3dc in the ch2 sp), [ch1, 3dc in the next ch1 sp], repeat to the last ch1 sp on the side, ch1, (3dc, ch2, 2dc in the next ch2 sp), dc in every dc on the side, (2dc, ch2, 3dc in the next ch2 sp), [ch1, 3dc in the next ch1 sp], repeat until the last ch1 sp on the side, ch1, 3dc in the corner, hdc join to the top of the beg ch3. Turn
This is the final round for sizes X – XL
Round 9:
Ch1, sl-st into the ch2 sp below. Ch3. dc into the ch2 sp, dc in every st and sp on the side, (2dc, ch2, 3dc in the ch2 sp), [ch1, sk3, 3dc in the next st], repeat until 3 sts remain on the side, ch1, sk3 (3dc, ch2, 2dc in the next ch2 sp), dc in every st and sp on the side, (2dc, ch2, 3dc in the next ch2 sp), [ch1, sk3, 3dc in the next st], repeat until 3sts remain on the side, ch1, sk3, 3dc in the ch2 sp, hdc join to the top of the beg ch3. Turn
Round 10:
Ch1, sl-st into the ch2 sp below. Ch3, 2dc into the ch2 sp, [ch1, 3dc into the next ch1 sp], repeat to the last ch1 sp on the side, ch1, (3dc, ch2, 2dc into the next ch2 sp), dc in every dc on the side, (2dc, ch2, 3dc in the next ch2 sp), [ch1, 3dc in the next ch1 sp], repeat to the last ch1 sp on the side, (3dc, ch2, 2dc in the next ch2 sp), dc in every dc on the side, 2dc in the ch2 sp, hdc join to the top of the beg ch3. Turn
This is the final round for sizes 2X – 3X
Round 11:
Ch1, sl-st into the ch2 sp below. Ch3. dc into the ch2 sp, dc in every dc on the side, (2dc, ch2, 3dc in the ch2 sp), [ch1, 3dc in the next ch1 sp], repeat to the last ch1 sp on the side, ch1, (3dc, ch2, 2dc in the next ch2 sp), dc in every dc on the side, (2dc, ch2, 3dc in the next ch2 sp), [ch1, 3dc in the next ch1 sp], repeat until the last ch1 sp on the side, ch1, 3dc in the corner, hdc join to the top of the beg ch3. Turn
Round 12:Ch1, sl-st into the ch2 sp below. Ch3, 2dc into the ch2 sp, [ch1, 3dc into the next ch1 sp], repeat to the last ch1 sp on the side, ch1, (3dc, ch2, 2dc into the next ch2 sp), dc in every dc on the side, (2dc, ch2, 3dc in the next ch2 sp), [ch1, 3dc in the next ch1 sp], repeat to the last ch1 sp on the side, (3dc, ch2, 2dc in the next ch2 sp), dc in every dc on the side, 2dc in the ch2 sp, hdc join to the top of the beg ch3.
This is the final round for sizes 4X – 5X
Join
Join Squares
Hold two squares together, right sides facing, and join in any corner through both squares with a sl-st, then, ch1, sl-st into the same sp, sl-st into the next st and each st and sp along to the next corner, sl-st into the corner. Tie off. Repeat this until all 7 squares are joined in a strip with one seam left to join.
Join Cups
With the right sides facing, pin your cups to the centre of your bralette band. The middle of your bralette cups should be attached to the middle stitch of your centre granny square, the outer corners should be pinned to the further corner of the NEXT granny square on each side.
It will NOT lay flat, this is correct.
Now insert your hook into the corner st of the cup and sq and join with a sl-st. Sl-st evenly across to join the cup and square until you reach the centre marked st. (It will cup a little this is fine)
Sl-st into the corner of the next cup and the same st as the previous cup, continue to sl-st across to the last st on the cup.
Do not tie off.
Edge
Continuing from where you were.
Sc into the next st, sc into each st to the last corner, sl-st to join to the square on the opposite side, sc into the same corner sp, sc into each st around until you reach the corner of the bralette cup where you began.
Sc into that st, then sc into each st and sp along the side of the cup until you reach the next ch2 sp, sc into the sp, sl-st into the sp, ch72, sc into the 2nd ch from the hook, sc into the next 70 chs, sc into the ch2 sp, sc into every st and sp along the side of the cup until you reach the next ch2 sp.
Sl-st into the ch2 sp and the granny square below, then sl-st into the granny square and the next cup, sc into every st and sp until the next ch2 sp, sc into the ch2 sp, sl-st into the ch2 sp, ch72, sc into the 2nd ch from the hook, sc into the next 70 sts, sc into the ch2 sp, sc into every st and sp until the next ch2 sp, sc into the sp, sl-st into the sp. Tie off
Rotate your work so that you will now work along the bottom edge of the band area.
With the right sides facing, rejoin with a sl-st into ‘free’ the corner of the granny square. Sc into the same sp, sc into each st and sp around until you reach the last corner, sl-st the two corners together, ch1, and sl-st into the same sp.
Row rotate your work so that you can work along the final seam between the two granny squares. Sl-st into the first st, sl-st into each st and sp across to corner. Sl-st into each corner. Tie of and secure all your ends.
Granny Merge Bralette Collabs
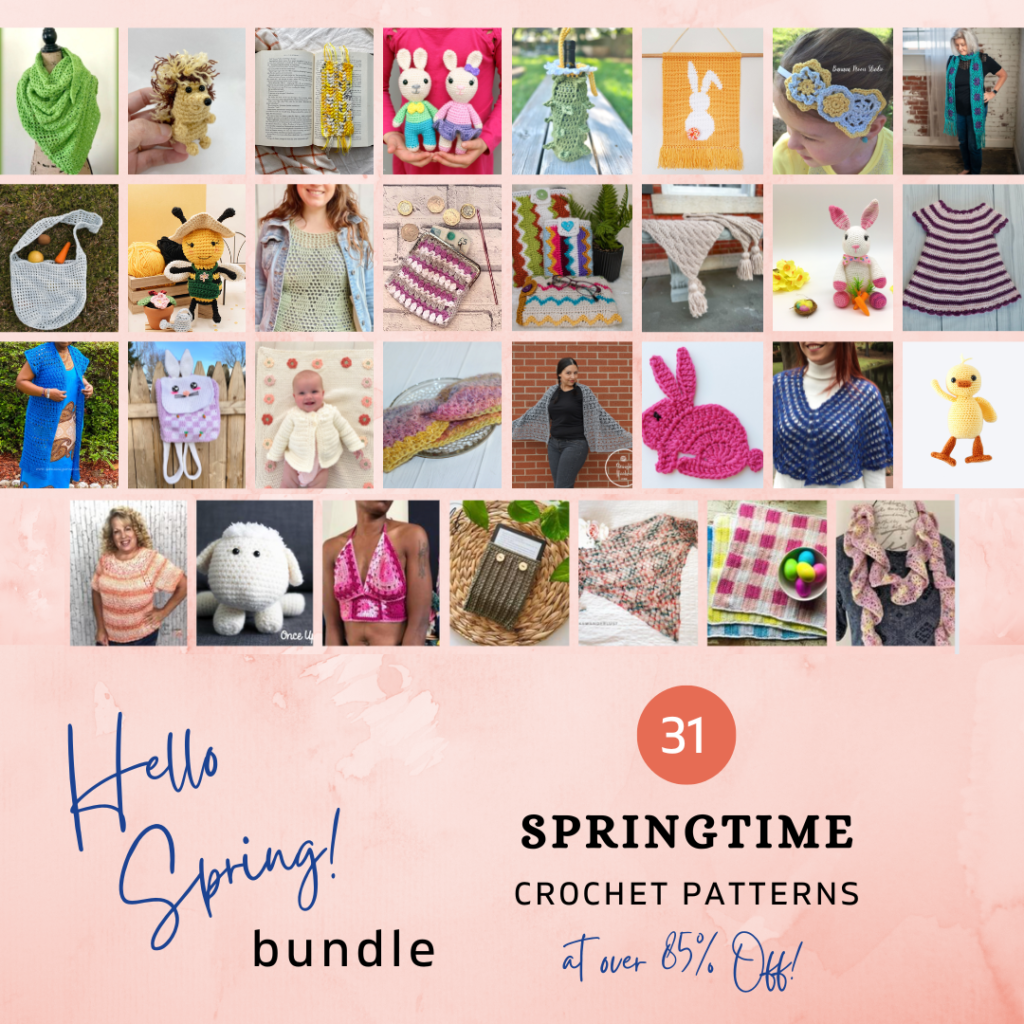
Looking for some patten inspiration to kick of your spring wardrobe and makes list? The Hello Spring Blog hop is just what you need. Featuring 31 Spring themed crochet patterns, a new pdf pattern will be available to download every day in March and today, 31st March is the featured day for the Granny Merge Bralette. To find out more about the event, and to get your FREE copy of the pdf pattern, head over to Itchin for Stitchin via the button below

Then, head over to Ravelry with your discount code before Midday 1st April to get your copy of the pattern.

Missed a few dates? Grab the entire 31 pattern bundle via the button below before the deal ends at Midnight tonight!

I hope you enjoyed the post.
For more summer crochet garment pattern inspiration, check out the Key West Summer Dress and the Split Decision Tunic.
Don’t forget to pop into the Facebook Group and share your wips and fo’s – I would love to see them.
I look forward to seeing your Granny Merge Bralette.
Bye for now,
B x