3 FREE easy crochet granny squares
This post may contain affiliate links. This means I may earn a small commission if you make a purchase from these links, at no additional cost to yourself.
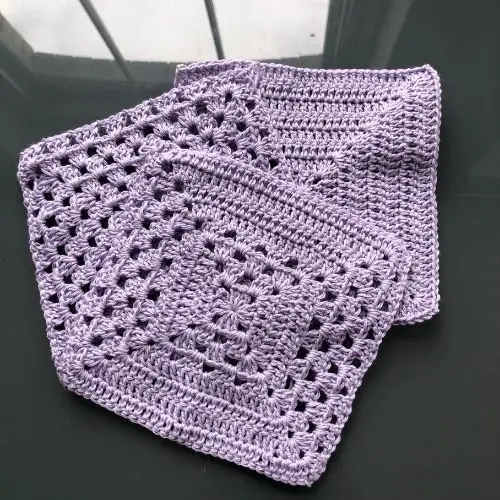
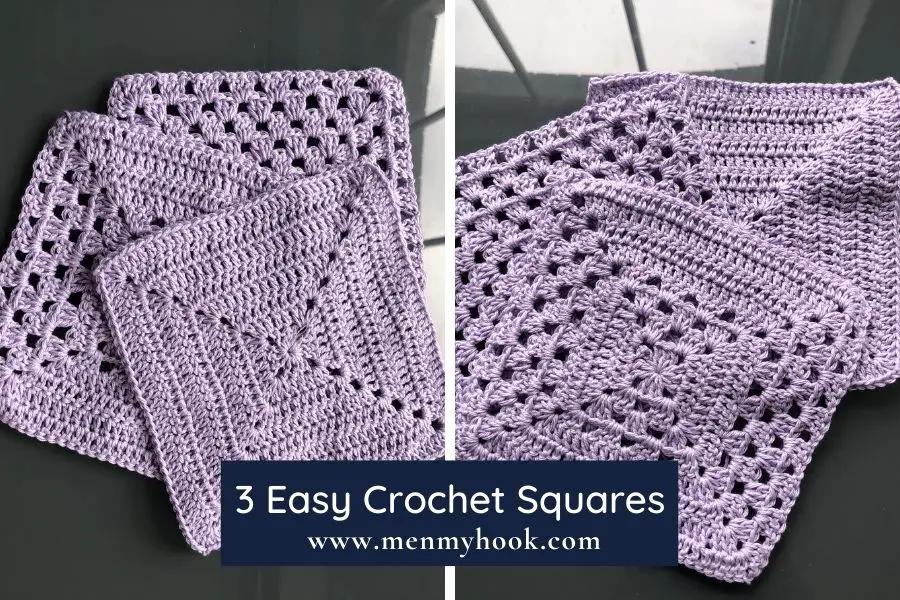
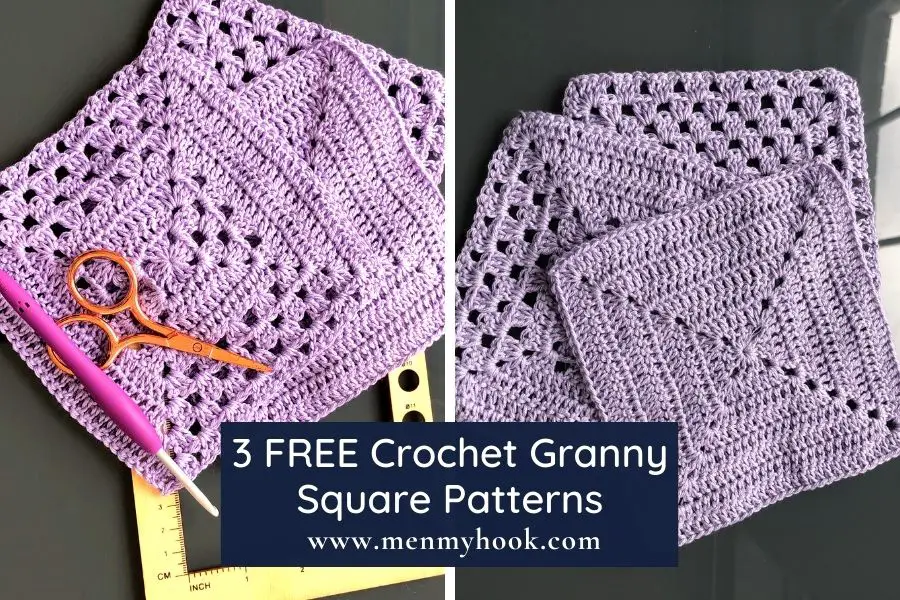
Looking for easy crochet granny squares? Check out these 5 easy crochet granny square patterns for beginners and learn how to make simple granny squares.
Why 3 easy crochet Granny Squares?
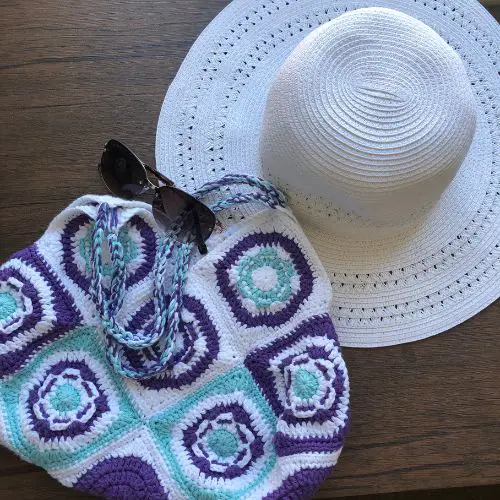
Have you noticed that crochet granny squares are all the rage recently? Sliders, handbags, cardigans – they are all over the groups and media in various colourful forms with very proud makers showing off their finished projects.
However, if you don’t know how to make a crochet granny squares yourself, this can look like a very challenging prospect. So below there are 3 beginner granny squares with photo tutorials and instructions for you to work through. All are beginner and can easily be adapted to create multiple projects using beginner granny squares.
You may find that you recognise the squares below as each can be made slightly differently to achieve the same result, the are the methods that I use to make perfect beginner easy crochet granny squares every time.
FREE Easy Crochet Granny Square Patterns
To keep things simple ALL the squares included in these free beginner granny square patterns all begin with the same first round. I have included the written pattern and photo tutorial for round 1 below.
Start of ALL Granny Square Patterns
Notes
- Ch3 counts as a dc
- Ch1 does not count as a st
- Rounds begin in the MIDDLE of the first corner of the round. Stitches at the end of the round will complete the corner
- Each ‘solid granny’ side grows by 4 stitches be mindful of the hidden stitch
Stitches & Abbreviations:
- Magic Ring – mr
- Single Crochet – sc
- Half Double Crochet – hdc
- Double Crochet – dc
- Slip Stitch – sl-st
- Stitch – st
- Space – sp
Special Stitches:
Hdc join – on the body section this is used to create a ch2 sp AND join at the end of the round. To complete this joining method, after completing the last stitch of the round, yarn over and insert the hook into the top of the beg ch3 of the round, yarn over and pull through all the loops on the hook as you would a hdc.
Start:
MR
Round 1:
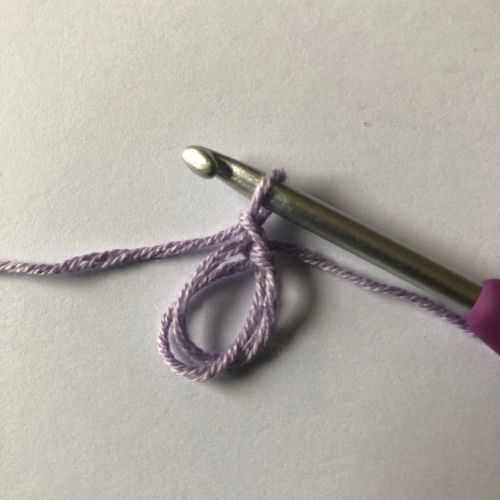
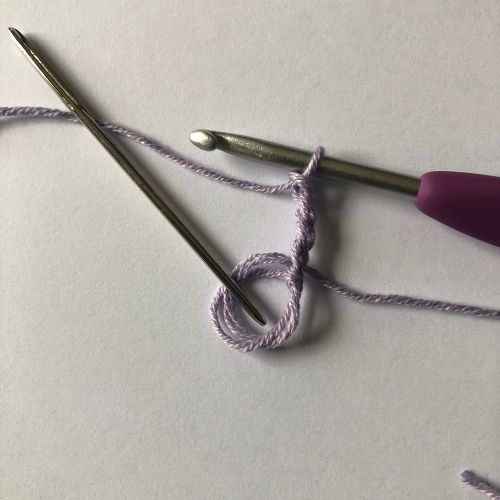
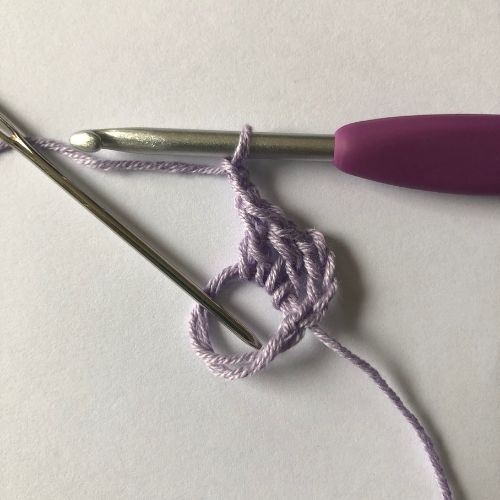
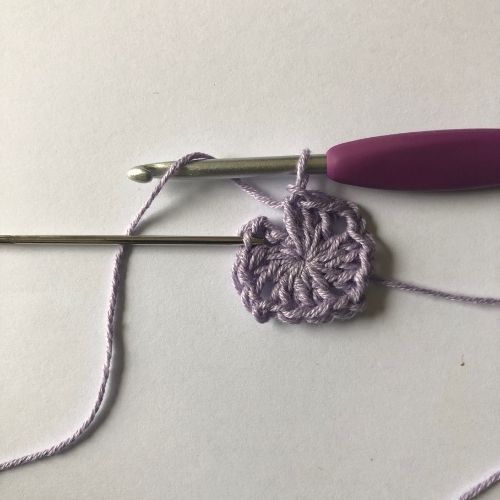
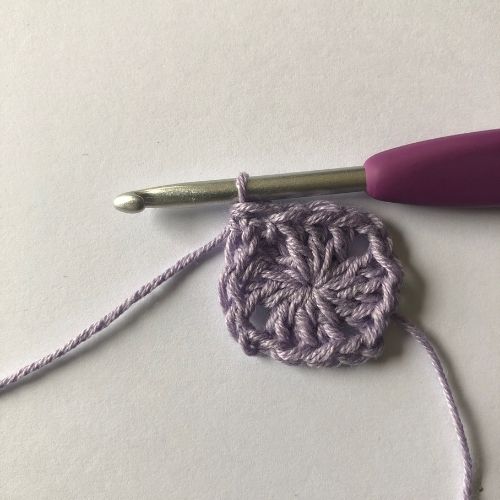
Ch3, 2dc into the ring, *ch2, 3dc into the ring* 3 times, hdc join to the top of the beg ch3. Turn
Traditional Granny Square
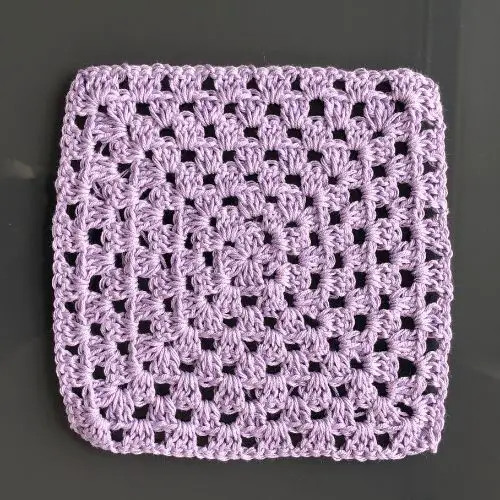
The Traditional Granny Square uses the granny stitch to create a light airy easy crochet granny square. Made entirely of double crochets and chains this square grows very quickly once you get the hang of it.
Start:
MR
Round 1:
Ch3, 2dc into the ring, *ch2, 3dc into the ring* 3 times, hdc join to the top of the beg ch3. Turn
Round 2:
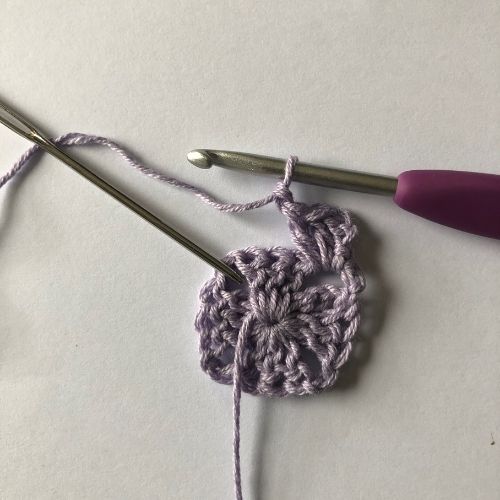
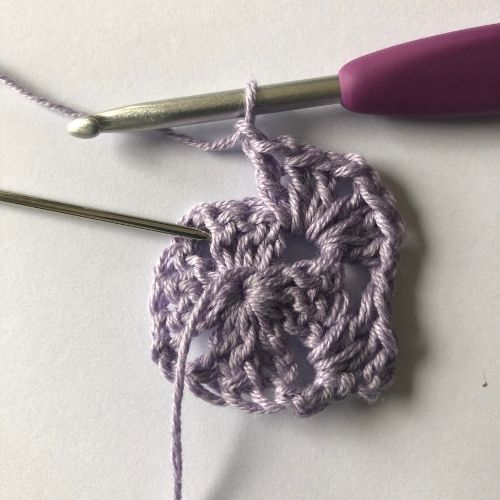
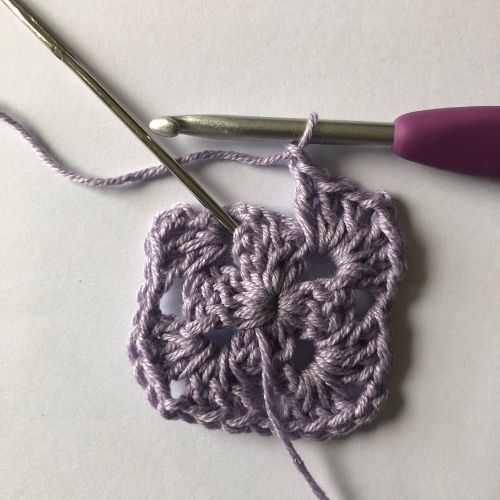
Ch1, sl-st into the ch2 sp below, ch3, 2dc into the sp, *ch1, 3dc, ch2, 3dc in the ch2 sp* 3 times, ch1, 3dc into the ch2 sp, hdc join into the top of the beg ch3. Turn
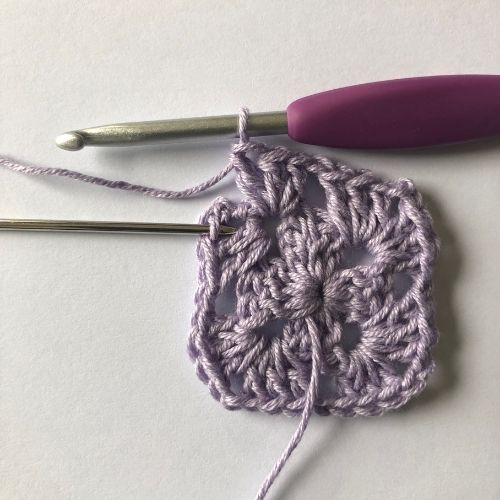
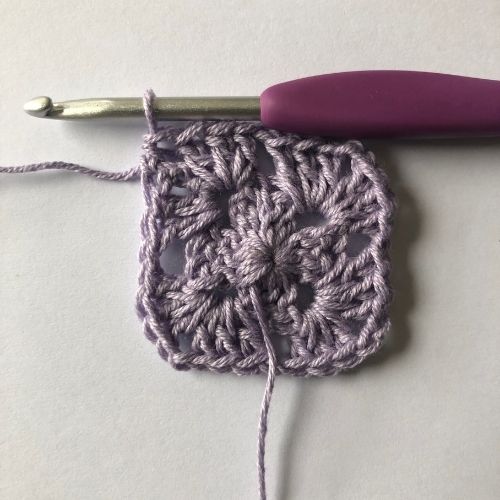
Round 3 – to the end:
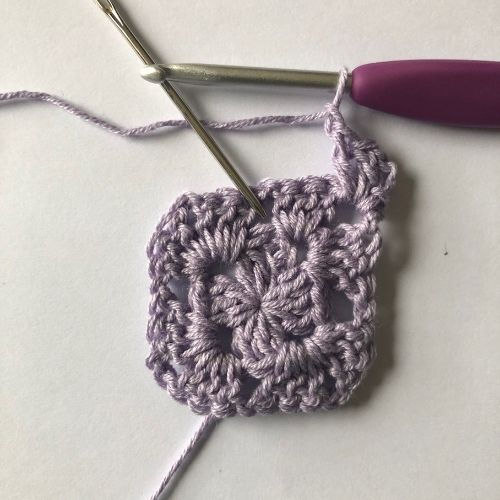
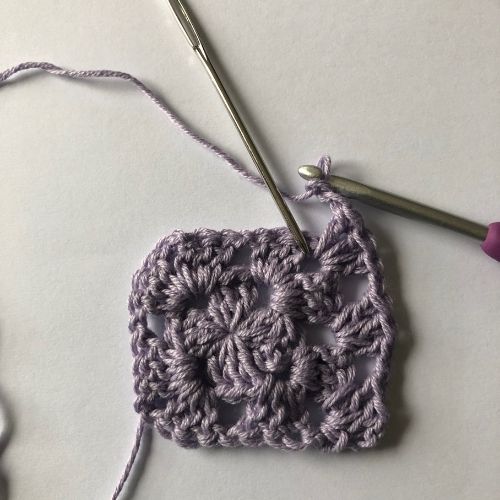
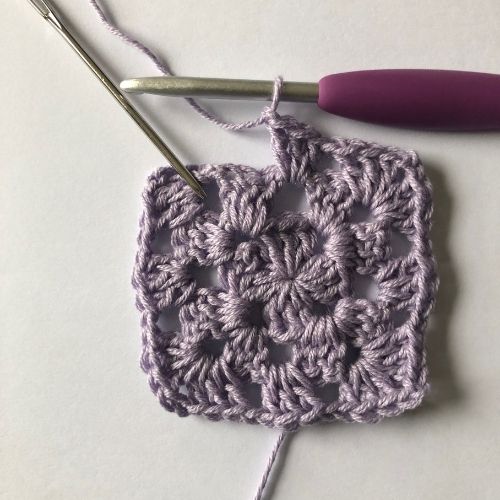
Ch1, sl-st into the ch2 sp below, ch3, 2dc into the ch2 sp, *ch1, 3dc in the next ch1 sp, ch1, (3dc, ch2, 3dc in the ch2 sp)* 3 times, ch1, 3dc in the next ch1 sp, ch1, 3dc in the ch2 sp, hdc join into the top of the beg ch3. Turn
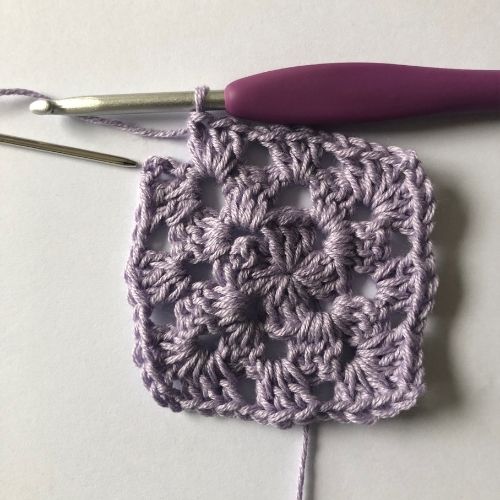
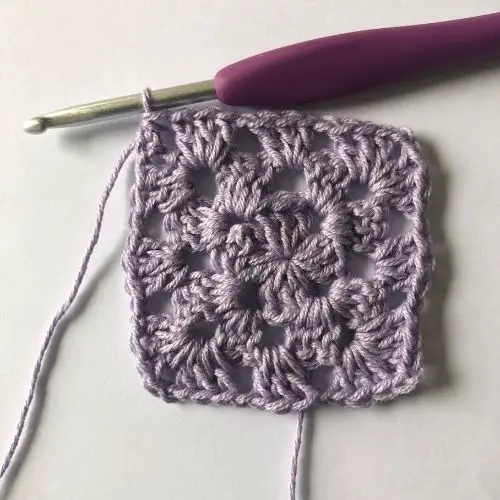
Repeat this final round until your square as achieved your required size.
Love this stitch? Check out Nain, which uses the granny stitch to make a one skein crochet scarf/shawl.
Solid Granny Square
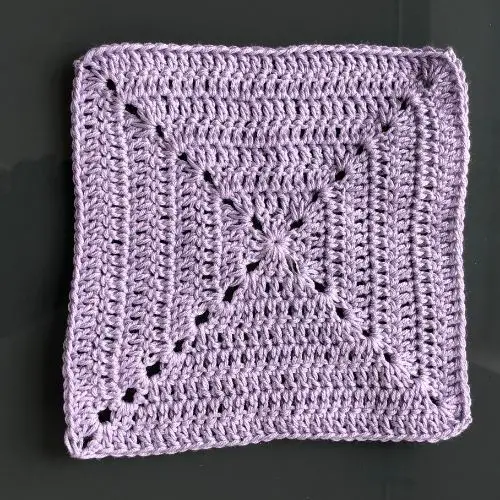
The Solid Granny Square is an easy beginner granny square that is almost entirely solid, as it’s name suggests. This square works up quickly and is a great way to practise tension and creating simple squares before moving onto more advanced granny square crochet patterns.
Start:
MR
Round 1:
Ch3, 2dc into the ring, *ch2, 3dc into the ring* 3 times, hdc join into the top of the beg ch3. Turn
Rounds 2 – to end:
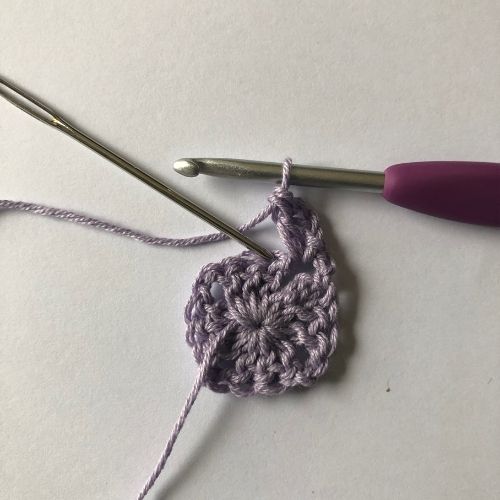
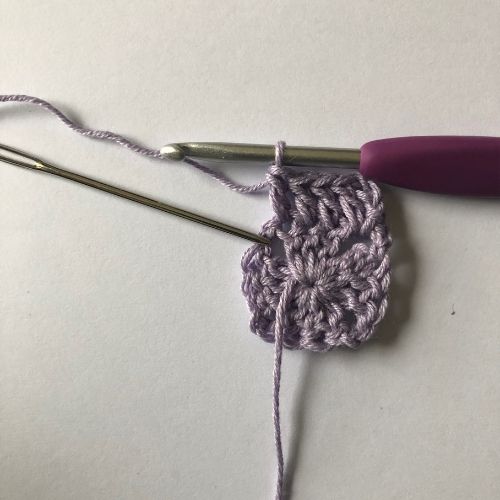
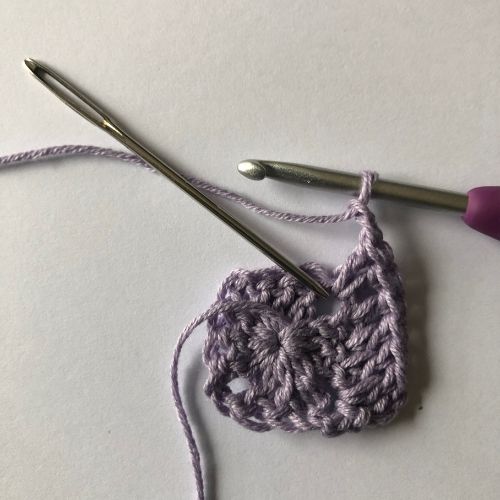
Ch1, sl-st into the ch2 sp below, ch3, dc into the ch2 sp, dc in every st, (2dc, ch2, 2dc into the ch2 sp), dc in every st* 3 times, 2dc into the ch2 sp, hdc join into the top of the beg ch3. Turn
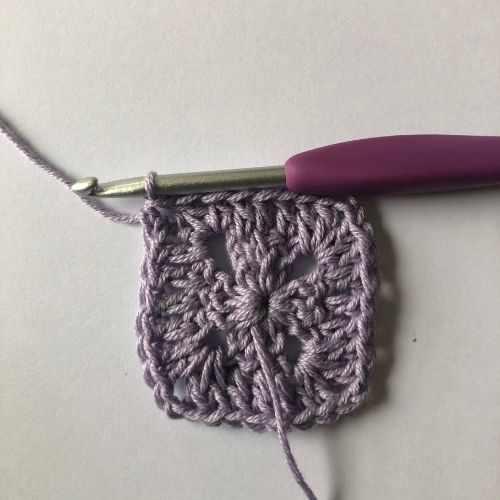
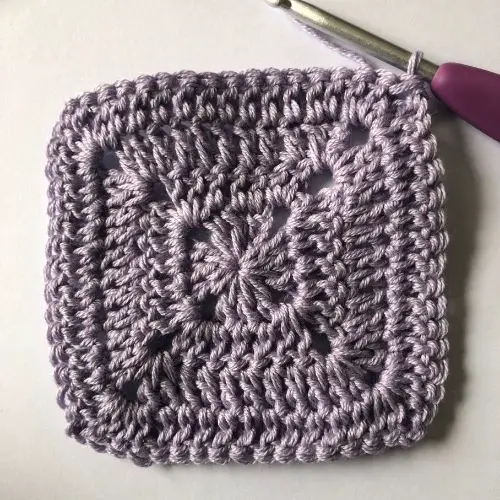
Repeat round 2 until your square has reached the required size.
For an alternative solid granny square pattern, check out the Communion Square or the Harmony Square.
Granny Merge Square
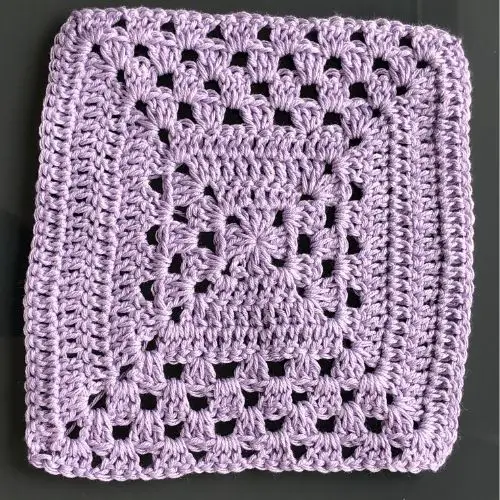
The Granny Merge Square is as the name suggests a combination of the two previous squares. Pay attention to the corners when making this easy crochet granny square – both the placement of the stitches in the corner and the stitches that follow the corners on this easy beginner granny square.
Notes:
- All corner stitches are marked in bold
- Each ‘solid granny’ side grows by 4 stitches be mindful of the hidden stitch
Start:
Magic Ring
Round 1:
Ch3 (counts as a dc here and throughout), 2dc into the ring, [ch2, 3dc into the ring], repeat 3 times, hdc join (see special stitches) into the top of the beg ch3. Turn
Round 2:
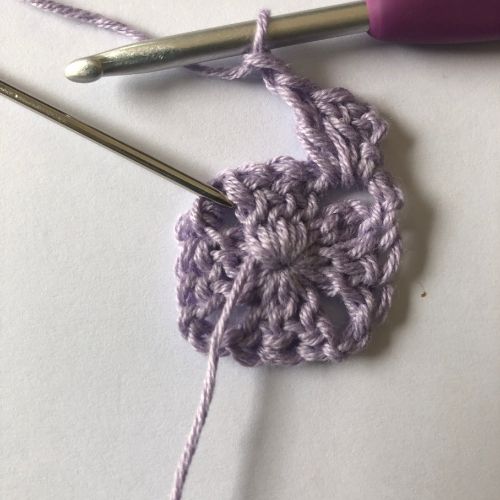
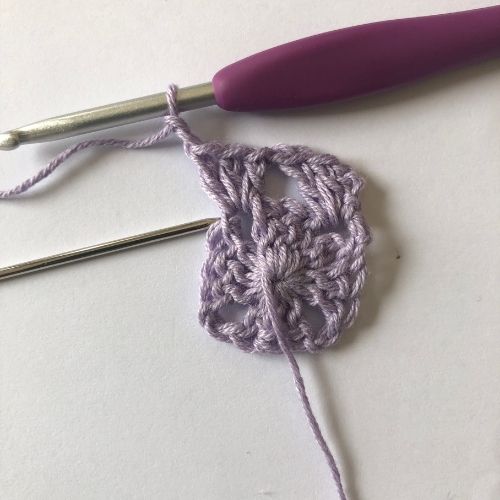
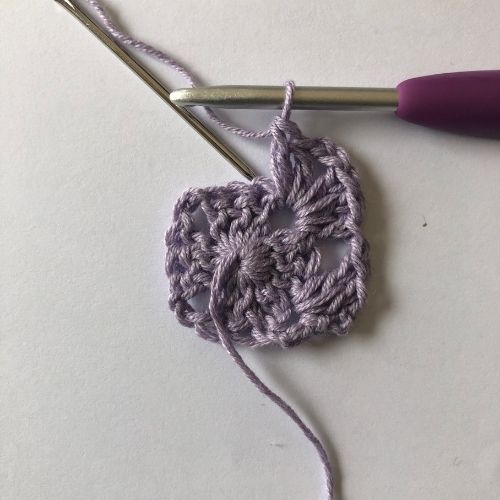
Ch1 – does not count as a st, sl-st into the ch2 sp below. Ch3, 2dc into the ch2 sp, ch1, sk3, (3dc, ch2, 2dc) into the next ch2 sp, dc in every dc to the next ch2 sp, (2dc, ch2, 3dc) in the next ch2 sp, ch1, sk3, (3dc, ch2, 2dc) in the next ch2 sp, dc in every st on the side, 2dc into the ch2 sp, hdc join into the top of the beg ch3. Turn
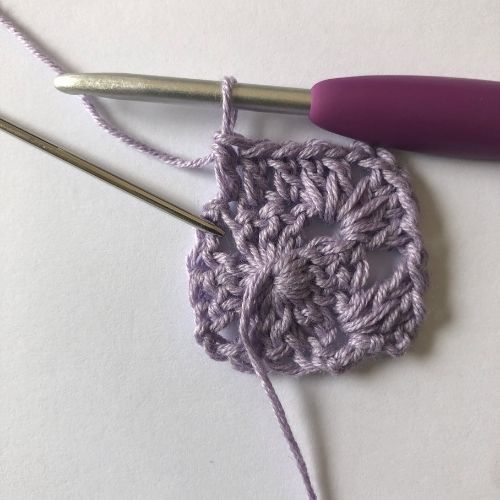
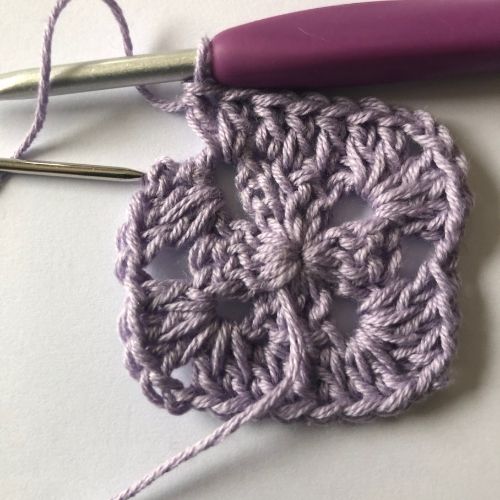
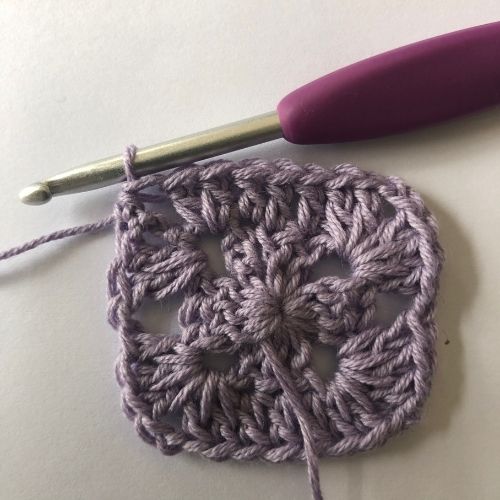
Round 3:
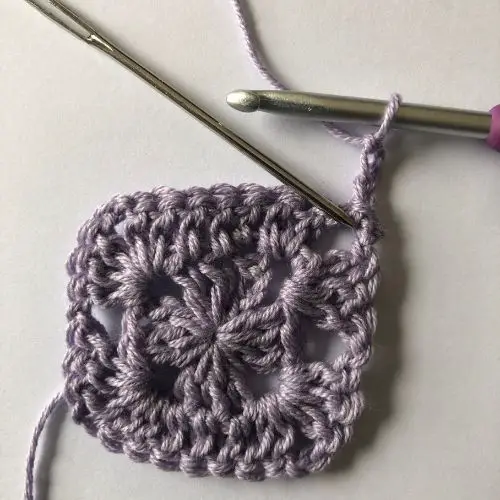
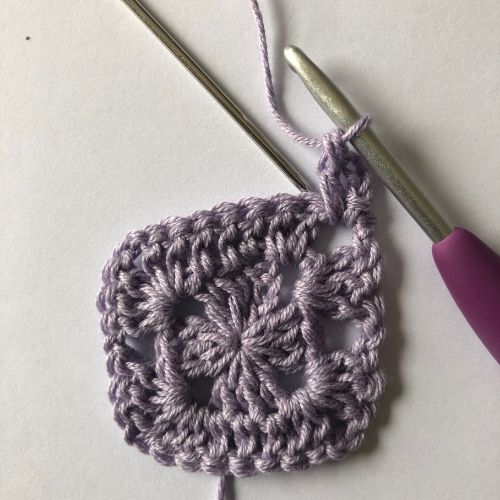
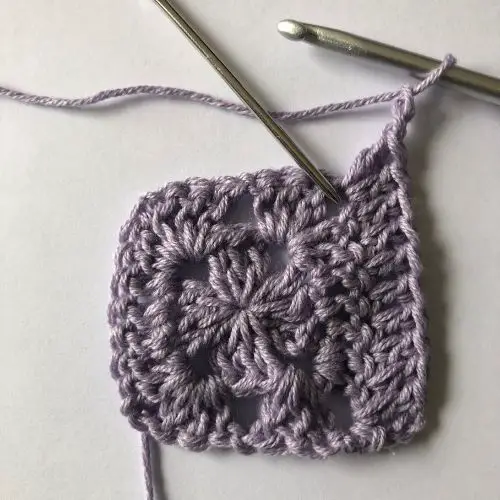
Ch1, sl-st into the ch2 sp below. Ch3. dc into the ch2 sp, dc in every dc on the side, (2dc, ch2, 3dc in the ch2 sp), ch1, 3dc in the next ch1 sp, ch1, (3dc, ch2, 2dc in the next ch2 sp, dc in every dc on the side, (2dc, ch2, 3dc in the next ch2 sp), ch1, 3dc in the next ch1 sp, ch1, 3dc in the corner, hdc join to the top of the beg ch3. Turn
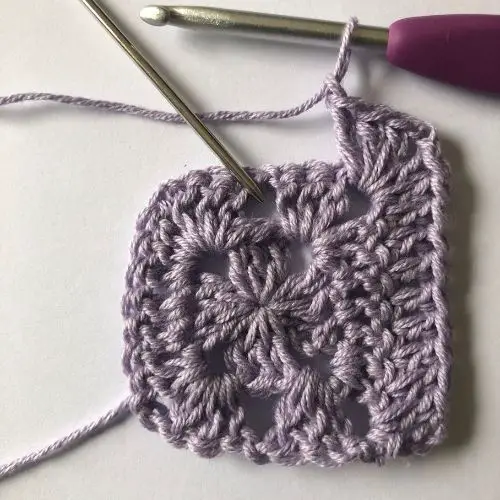
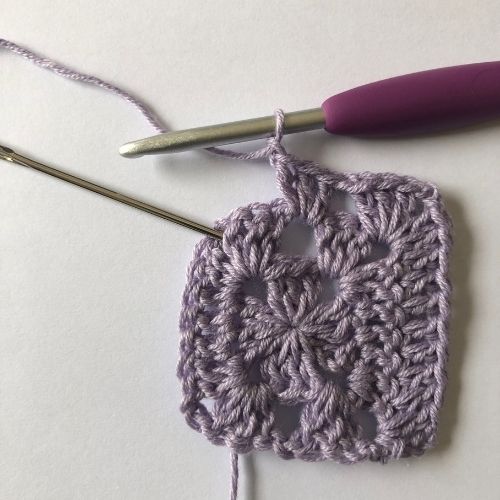
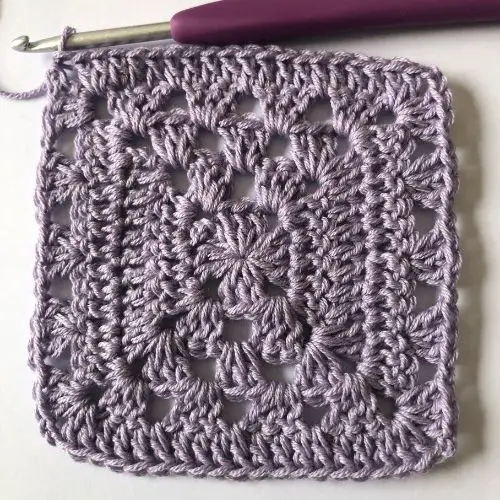
Round 4:
Ch1, sl-st into the ch2 sp below. Ch3, 2dc into the ch2 sp, [ch1, 3dc into the next ch1 sp], repeat to the last ch1 sp on the side, ch1, (3dc, ch2, 2dc into the next ch2 sp), dc in every dc on the side, (2dc, ch2, 3dc in the next ch2 sp), [ch1, 3dc in the next ch1 sp], repeat to the last ch1 sp on the side, ch1, (3dc, ch2, 2dc in the next ch2 sp), dc in every dc on the side, 2dc in the ch2 sp, hdc join to the top of the beg ch3. Turn
Round 5:
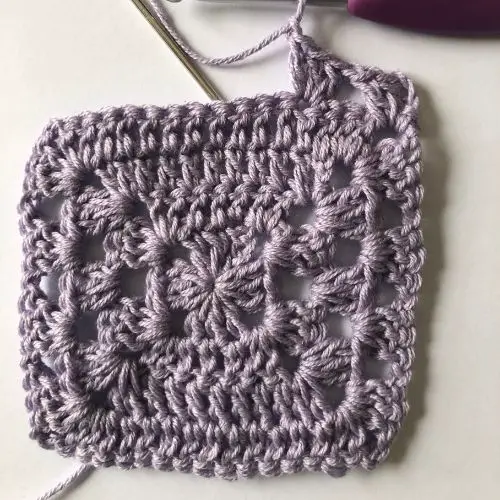
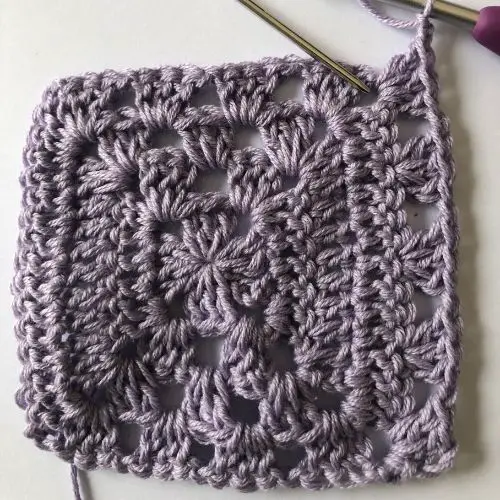
Ch1, sl-st into the ch2 sp below. Ch3, 2dc into the ch2 sp, [ch1, sk3, 3dc in the next st], repeat until 3 sts remain on the side, ch1, (3dc, ch2, 2dc in the next ch2 sp), dc in every st and sp on the side, (2dc, ch2, 3dc in the next ch2 sp), [ch1, sk3, 3dc in the next st], repeat until 3 sts remain on the side, ch1, sk3, (3dc, ch2, 2dc in the next ch2 sp), dc in every st and sp on the side, 2dc in the ch2 sp, hdc join to the top of the beg ch3. Turn
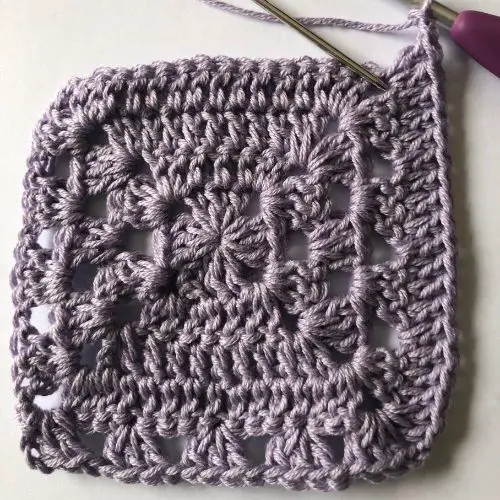

Round 6:
Ch1, sl-st into the ch2 sp below. Ch3. dc into the ch2 sp, dc in every dc on the side, (2dc, ch2, 3dc in the ch2 sp), [ch1, 3dc in the next ch1 sp], repeat to the last ch1 sp on the side, ch1, (3dc, ch2, 2dc in the next ch2 sp), dc in every dc on the side, (2dc, ch2, 3dc in the next ch2 sp), [ch1, 3dc in the next ch1 sp], repeat until the last ch1 sp on the side, ch1, 3dc in the corner, hdc join to the top of the beg ch3. Turn
Round 7:
Ch1, sl-st into the ch2 sp below. Ch3, 2dc into the ch2 sp, [ch1, 3dc into the next ch1 sp], repeat to the last ch1 sp on the side, ch1, (3dc, ch2, 2dc into the next ch2 sp), dc in every dc on the side, (2dc, ch2, 3dc in the next ch2 sp), [ch1, 3dc in the next ch1 sp], repeat to the last ch1 sp on the side, (3dc, ch2, 2dc in the next ch2 sp), dc in every dc on the side, 2dc in the ch2 sp, hdc join to the top of the beg ch3. Turn
Round 8:
Ch1, sl-st into the ch2 sp below. Ch3. dc into the ch2 sp, dc in every dc on the side, (2dc, ch2, 3dc in the ch2 sp), [ch1, 3dc in the next ch1 sp], repeat to the last ch1 sp on the side, ch1, (3dc, ch2, 2dc in the next ch2 sp), dc in every dc on the side, (2dc, ch2, 3dc in the next ch2 sp), [ch1, 3dc in the next ch1 sp], repeat until the last ch1 sp on the side, ch1, 3dc in the corner, hdc join to the top of the beg ch3. Turn
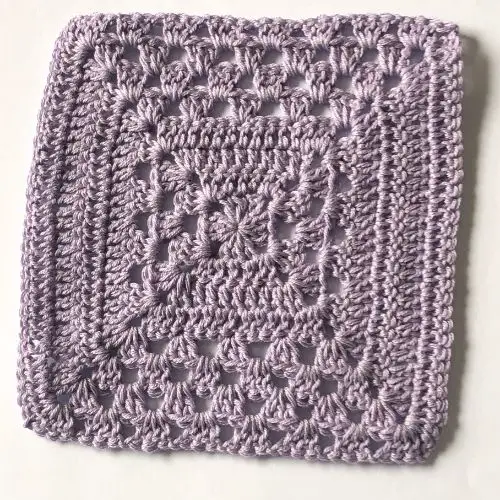
Round 9:
Ch1, sl-st into the ch2 sp below. Ch3. dc into the ch2 sp, dc in every st and sp on the side, (2dc, ch2, 3dc in the ch2 sp), [ch1, sk3, 3dc in the next st], repeat until 3 sts remain on the side, ch1, sk3 (3dc, ch2, 2dc in the next ch2 sp), dc in every st and sp on the side, (2dc, ch2, 3dc in the next ch2 sp), [ch1, sk3, 3dc in the next st], repeat until 3sts remain on the side, ch1, sk3, 3dc in the ch2 sp, hdc join to the top of the beg ch3. Turn
Round 10:
Ch1, sl-st into the ch2 sp below. Ch3, 2dc into the ch2 sp, [ch1, 3dc into the next ch1 sp], repeat to the last ch1 sp on the side, ch1, (3dc, ch2, 2dc into the next ch2 sp), dc in every dc on the side, (2dc, ch2, 3dc in the next ch2 sp), [ch1, 3dc in the next ch1 sp], repeat to the last ch1 sp on the side, (3dc, ch2, 2dc in the next ch2 sp), dc in every dc on the side, 2dc in the ch2 sp, hdc join to the top of the beg ch3. Turn
Round 11:
Ch1, sl-st into the ch2 sp below. Ch3. dc into the ch2 sp, dc in every dc on the side, (2dc, ch2, 3dc in the ch2 sp), [ch1, 3dc in the next ch1 sp], repeat to the last ch1 sp on the side, ch1, (3dc, ch2, 2dc in the next ch2 sp), dc in every dc on the side, (2dc, ch2, 3dc in the next ch2 sp), [ch1, 3dc in the next ch1 sp], repeat until the last ch1 sp on the side, ch1, 3dc in the corner, hdc join to the top of the beg ch3. Turn
Round 12:
Ch1, sl-st into the ch2 sp below. Ch3, 2dc into the ch2 sp, [ch1, 3dc into the next ch1 sp], repeat to the last ch1 sp on the side, ch1, (3dc, ch2, 2dc into the next ch2 sp), dc in every dc on the side, (2dc, ch2, 3dc in the next ch2 sp), [ch1, 3dc in the next ch1 sp], repeat to the last ch1 sp on the side, (3dc, ch2, 2dc in the next ch2 sp), dc in every dc on the side, 2dc in the ch2 sp, hdc join to the top of the beg
Rounds 13 – 20:
Repeat rows 5 – 12. Tie off and secure your ends.
Hopefully, by now you are making really uniform granny squares and are ready to tackle more advanced granny square crochet projects!
For garment lovers, check out the Granny Merge Cocoon
For bag lovers, check out the Harmony Bag
For blanket/afghan lovers, check out the Harmony Square, a larger easy crochet granny square which could be used to make a single motif afghan.
I hope you enjoyed the post.
Don’t forget to pop into the Facebook Group and share your wip’s and fo’s – I would love to see your granny square projects!
Bye for now,
B

